
Full color 3D printing is a much more involved process than printing out photos on a 2D photo printer. Reliability for full color 3D printers is between 65% and 75% and there is a significant learning curve if you're new to the industry. For most 3D figurine companies it usually doesn't make sense to do your own full color 3D printing unless it isn't physically possible to have 3D printed figurines shipped to you. If you're a Twindom customer, you automatically get access to Twindom's worldwide network of full color 3D print partners that ship worldwide. The main reason for this is because of the time investment it takes to be able to print reliably on a Projet 660 (the full color 3D printer of choice for 3D printed figurines). That said it's still important you understand how the process works in case you decide it ever does make sense to do your own full color 3D printing. Here are the major steps:
*Note: Scroll to the end of the article to learn about a new step in the process for making 3D printed figurines.- Load into 3D Print software
- Run full color 3D printer
- Dry 3D Prints
- Pull 3D Prints
- Depowder 3D Prints
- Infiltrate
- Cyanoacrylate drying
Load into 3D Print software

The 3D printer is controlled by software that comes packaged with the 3D printer called 3DPrint. 3DPrint allows you to import models, position them in the build and start prints. The quality of the final 3D print is affected by the orientation of the model inside the 3D printer. It is usually recommended to print the 3D models laying on their side as this orients the 3D printing build lines straight up and down the model which helps hide them.
Run full color 3D printer
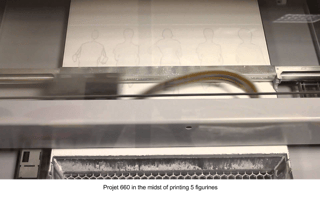 Like a regular 2D printer, this part happens automatically. The only difference is that to print 1 3D printed figurine it takes a minimum of 2 hours. Normally people will print in batches of 10 figurines which works out to a ~12 hour printer runtime.
Dry 3D Prints
Once the 3D printer has completed a build the models must sit inside the bed of powder for an additional 90 minutes to “dry.” The drying process helps the binders set so that the models are more robust for the post-processing step. When the models have finished “drying” in the printer bed, they are ready to be pulled from the printer bed and post-processed.
Pull 3D Prints
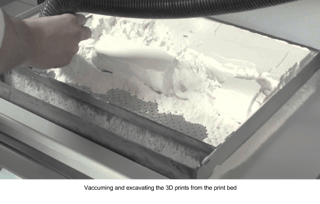
Pulling the models from the printer bed is achieved using the vacuum built into the 3D printer. The models are buried in the powder so the vacuum is used to suck up the powder surrounding the models until enough of the model is exposed to very carefully move it into the attached de-powdering station. At this stage the 3D prints are very fragile and would easily crush in your hand if you applied force. The prints, especially if there are small features, can collapse under the weight of the excess powder if a thorough enough vacuuming isn’t performed.
Depowder 3D Prints
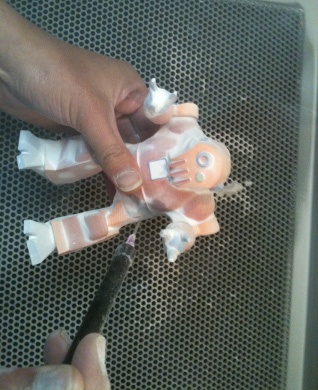 The de-powdering chamber contains a small stylus attached to an integrated air compressor to blow off the remainder of the excess powder from the models. This step requires as much careful attention as pulling the models from the printer as the models are still very fragile and any powder that is not blown off the model will become a permanent fixture of the model during the next step.
Infiltrate
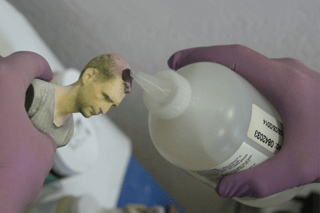 Once the fine de-powdering of the models is complete they are removed from the de-powdering chamber and moved to an area properly equipped to deal with large amounts of cyanoacrylate (super glue). This typically means a workstation with an exhaust hood, disposable gloves, an apron or other protective clothing, airtight lab goggles and a chemical mask. The models are then doused in cyanoacrylate either by submersion, by having it poured over top or having it sprayed on. The cyanoacrylate infiltrates the models to give them additional strength and also burns off the top layer of powder increasing the vibrancy of the colors on the prints. Cyanoacrylate emits very strong fumes that can cause serious harm to your lungs and eyes. Skin contact with large quantities of cyanoacrylate can cause chemical burns.
Cyanoacrylate drying
The models must sit and dry for 1- 4 hours following the application of cyanoacrylate. Cyanoacrylate bonds very strongly, so special drying racks must be assembled to prevent the models from becoming permanently fixed to a surface, or the models must be routinely moved.
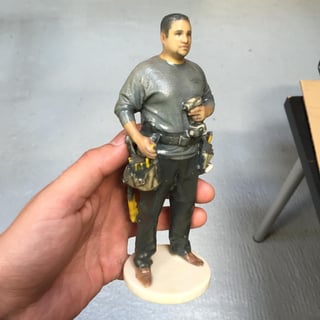 A few companies have developed additional post-processing steps following the application of cyanoacrylate to either change the surface quality of the 3D print such as applying an epoxy (pictured above) to give the prints a glassy sheen or to fix or hide 3D printing defects such as applying a very thin layer of wax to fill in “build lines.”

Update since original posting:
When this post was originally written people were still learning what worked best for making high quality 3D printed figurines. Now that companies have the basics down the new focus has been add-ons to 3D prints that make colors pop more or give the print special properties such as water resistance or UV resistance. Similar to how you can apply special coatings to photos, the same is coming true for full color 3D prints. Like regular 2D photos, 3D printed figurines will fade over time if not cared for properly. The new coatings that companies are now offering ultimately provide a better product to the end customer by making each 3D printed figurine last longer. One example of a UV and water resistant coating is Twindom's new TwinProtect Coating. The TwinProtect Coating is specially formulated to make 3D printed figurines last longer and not lose their luster. For more on TwinProtect, click here.